Hand Held Surf Wings lack the ability to store energy like Kites as they cannot be flown up overhead and then dived in a long arc converting this stored energy into temporary lift on the kite wing and resulting force on the board and rider.
Light and Frost(L&F) turned their attention into trying to provide more lift to these hand held wing surfaces. One aerodynamic method is to add flaps to the wing.
Wing flaps increase the camber or curvature of the wing, thus increasing the lift a wing can generate. This allows the wing to produce lift at a lower speed. Speed for a hand held wing is the wind speed crossing the wing surface or the relative air speed once the wing and board are moving forward. Wing flaps also produce drag, therefore the flap is used during start/takeoff and then removed once takeoff has been completed.
A very simple wing flap Mod for Hand Held Wings has been devised using local materials.
1. In aviation structures "Hard Points" are used in areas under load or pressure. Small hard points were glued on the top of the wings' trailing edge. The wing surface is a series of cloth panels stitched together. Where these panels are joined at the trailing edge, small squares of gypsum tape were glued over the hard point area using rubber cement then covered with cloth tape and more rubber glue and allowed to dry flat in the sun. Once dried a small hole was made thru this hard point using a soldering iron. The hot iron easily melts thru the hard point and wing materials, seals the holes internal area and does not put pressure on the hard point glued area when forming the hole. Suggest you only use a soldering iron. Six hard(6) points were installed on the trailing six meter hand held wing.
These Hard points are the ONLY real alteration to the wing itself. Many hand held wings have trailing edge stiffeners or thick plastic and cloth acting much like untensioned battons. Thus you are only adding what is already on some advanced hand held wing models for sale today. The rest of the assembly is just tied on and could be removed in minutes.
2. To have the trailing edge of the wing form a flap, tension is put on the trailing edge thru these hard points. Here simple thin plastic rope was used. Plastic rope is cheap, stiffer and less prone to tangle. You could use kite string at these hard points but kite string is flexible. As the tension required here is not that great, plastic rope was the obvious choice. For purposes here we will call these lines Trailing Edge Flap Tension Lines(TEFEL).
These TEFEL were inserted thru the hard point holes from the bottom to the wing top then on thru large plastic washers and then a very small stainless steel metal washer and tied off with an eight knot as a stopper knot on the top of wing.
The other ends of these TEFTL when fasten to the hard point were stretched from the hard point to where they have a length that reached the second handhold from the front of the wing and then cut there. You are cutting these TEFTL longer then required. Latter these TEFTL lengths will be adjusted when you tune the wing. Each time you cut the plastic rope burn the end and DONOT allow any of the hot dripping plastic to contact the wing as it will burn thru the cloth. If you are using more expensive line then cut any cheap line first and once you get the lengths required at the end of this installation and tuning process you can change out the cheap line for a more expensive type of line.
Tension Control Assembly(TCA); This assembly puts tension on the TEFTL bending the trailing edge into a flap. The TEFTL lines are joined together thru a lark head loop which is also looped thru a small fishing spinner. You could use a rope loop larks head instead of a spinner here as well. Another loop/pulley like assembly is attached to a handhold further down. These fishing spinners act like pulleys but again rope "truckers knots or diamond knots" can be used instead here. The white Tension Control Line(TCL), is just a line with two(2) monkey fist knots tied on each end and then the length of line between these monkey knots is adjusted by shortening or lengthening the length of line between the two monkey knots. Pulling on a monkey knot then tensions the TEFTL and causes a flap trailing edge to form. These monkey knots are larger then the fishing spinners or truckers knots and cannot slipped out. If using metal spinners then one of the monkey knots must be tied after passing the rope thru the spinner and then the length adjusted. If a truckers knot is used as the pulley just tie the truckers knot push the Monkey knot thru the truckers knot and then reduce the diameter of the truckers knot so the monkey knot cannot slip out. When riding you can shorten the TCA length by looping the knot around one of hand hold on the wing. There are many ways to lock the tension in and still allow quick release.
You will need to adjust each TEFTL by moving the stopper knots on the end of these lines so that the tensions on all the lines are equal. When tension on the white TCA line is shortened the trailing edge should form a flap and the lines have equal tension. When the TCA is lengthened(released) the trailing edge returns normal with little or no tension is applied.
Next take the wing out when the wind is blowing and fine tune the lines and assembly.
The TCA is in the early stages of development. If we come up with better systems we will post here.
1. Hard Points - Spreaders on the trailing edge of the wing
2. Trailing Edge Flap Tension Lines(TEFTL) - Lines which pull the trailing edge down to form a flap
3. Tension Control Assembly - The mechanism which tensions the TEFTL causing a flap to form on the trailing edge.
Flap Modification for Hand held Wings
-
lightandfrost
- Medium Poster
- Posts: 68
- Joined: Thu Jul 13, 2017 1:48 am
- Kiting since: 1999
- Weight: N/A
- Local Beach: N/A
- Favorite Beaches: N/A
- Style: onshore waveriding
- Gear: N/A
- Brand Affiliation: SOKG (Self Organizing Kite Group)
- Has thanked: 0
- Been thanked: 9 times
- Contact:
-
Frankieboy

- Very Frequent Poster
- Posts: 1058
- Joined: Fri Jan 02, 2004 9:05 pm
- Brand Affiliation: None
- Has thanked: 33 times
- Been thanked: 46 times
Re: Flap Modification for Hand held Wings
I never hold a Strike but what I understand is the trailing edge is tensioned.
Why not having a tensioned TE and use flex in the tips to release it (the LE) when loaded?
Why not having a tensioned TE and use flex in the tips to release it (the LE) when loaded?
-
Matty V
- Very Frequent Poster
- Posts: 641
- Joined: Mon Mar 23, 2020 2:24 pm
- Kiting since: 1998
- Gear: Home made
- Brand Affiliation: None
- Has thanked: 45 times
- Been thanked: 121 times
Re: Flap Modification for Hand held Wings
Kites can’t store energy.
If they did they would be able to climb on slack lines
They can generate a lift force that increases with speed through the sine movement
May this venture be more successful than the reinvention of the hydrofoil..
If they did they would be able to climb on slack lines
They can generate a lift force that increases with speed through the sine movement
May this venture be more successful than the reinvention of the hydrofoil..
-
Schietwedder

- Medium Poster
- Posts: 191
- Joined: Sun Dec 09, 2018 1:35 pm
- Local Beach: Surendorf, Kiel, Germany
- Gear: Diy Gear
- Brand Affiliation: None
- Has thanked: 23 times
- Been thanked: 68 times
Re: Flap Modification for Hand held Wings
Just a few comments on aerodynamics, I don't know much about wing ding design to start with.
-The most recent wing designs all are equipped with a very thick and cambered front section of the center profile and more or less but always some reflex in the aft part.
Bear in mind that this profile shape gives the wing some pitching stability (delta cm is small over a range of AoA) which could be essential for its function. (A lot of pressure on the back hand, wing could Frontstall or flutter if held by one hand if without reflex).
If changing the camber in the back you change the pitching moment cm a lot, far less if you'd increase the camber in the front.
I never winged until yet and it might be that my comments are irrelevant in winging practice but I would be surprised to see reflex on those wings then.
Another question, no offence just out of curiousity, Isn't the wing so simple because you change the AoA by hand and that's it?
Is it stalling too fast in practice so you would need more camber to get going?
Why then don't using a bigger wing or even more efficiently a bigger foil area which has far bigger effect in 1000x more dense water.
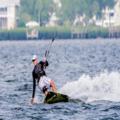
On the picture the wing looks to be reflexed a lot in the back maybe too much so you're killing the power and induce early stall what you're now trying to correct with those lines?
Maybe a hinge in the centre strut would be even more efficient to increase the center profile camber cleanly maybe together with a leech line.
But I guess as stated by others above the secret lies in cloth tension and eventual twisting of the tips to release some power and also dehydral shape of wing.
Nevertheless curious what your findings are on the water.
-The most recent wing designs all are equipped with a very thick and cambered front section of the center profile and more or less but always some reflex in the aft part.
Bear in mind that this profile shape gives the wing some pitching stability (delta cm is small over a range of AoA) which could be essential for its function. (A lot of pressure on the back hand, wing could Frontstall or flutter if held by one hand if without reflex).
If changing the camber in the back you change the pitching moment cm a lot, far less if you'd increase the camber in the front.
I never winged until yet and it might be that my comments are irrelevant in winging practice but I would be surprised to see reflex on those wings then.
Another question, no offence just out of curiousity, Isn't the wing so simple because you change the AoA by hand and that's it?
Is it stalling too fast in practice so you would need more camber to get going?
Why then don't using a bigger wing or even more efficiently a bigger foil area which has far bigger effect in 1000x more dense water.
On the picture the wing looks to be reflexed a lot in the back maybe too much so you're killing the power and induce early stall what you're now trying to correct with those lines?
Maybe a hinge in the centre strut would be even more efficient to increase the center profile camber cleanly maybe together with a leech line.
But I guess as stated by others above the secret lies in cloth tension and eventual twisting of the tips to release some power and also dehydral shape of wing.
Nevertheless curious what your findings are on the water.
-
Peter_Frank

- Very Frequent Poster
- Posts: 12794
- Joined: Wed Oct 16, 2002 1:00 am
- Brand Affiliation: None
- Location: Denmark
- Has thanked: 1022 times
- Been thanked: 1193 times
Re: Flap Modification for Hand held Wings
Correct, kites don't have stored energi.
It is the sweep, like when a wind power station sweeps when turning, to extract energy.
So absolutely no resemblance to the use of flaps.
As the latter increase the max lift a lot, on cost of loads of drag.
But it might work in order to get one size to have a better upper end.
Sorry, I don't get the "reinvention" you wrote, what did you mean?
Kitefoil and wingfoil has and is some of the best things that has ever happened in wind sports, a game changer indeed.
The hydrofoil concept was invented more than 100 years ago though, if that was your point
-
fluidity

- Very Frequent Poster
- Posts: 659
- Joined: Sat Mar 19, 2016 11:20 pm
- Kiting since: 2015
- Weight: 115kg
- Local Beach: Ngati Toa, Plimmerton, Titahi Bay, Waikanae, Petone, Seatoun, Lyall Bay, Eastbourne, Lake Wairarapa
- Favorite Beaches: Plimmerton
- Style: Wave, jump
- Gear: Transitioned from Kiting to Wingsurfing late 2019. Building my own foils from my CAD designs and 3D prints, CNC machine.
- Brand Affiliation: Designer of hydrofoils and many other things.
- Location: Porirua New Zealand
- Has thanked: 46 times
- Been thanked: 91 times
Re: Flap Modification for Hand held Wings
I may come back to this but it's not a promising start, to claim kites store energy as you are claiming. They can take advantage of aparent wind irrespective of the rider's speed. Good luck on the flaps though.lightandfrost wrote: ↑Sun Feb 28, 2021 4:24 amHand Held Surf Wings lack the ability to store energy like Kites as they cannot be flown up overhead and then dived in a long arc converting this stored energy into temporary lift on the kite wing and resulting force on the board and rider.
***Light and Frost(L&F) turned their attention*** into trying to provide more lift to these hand held wing surfaces. One aerodynamic method is to add flaps to the wing.
re the *** bit: Always hard talking about ones self in the third person. Does strange things to credibility.
(but not for fluidity)
-
Matty V
- Very Frequent Poster
- Posts: 641
- Joined: Mon Mar 23, 2020 2:24 pm
- Kiting since: 1998
- Gear: Home made
- Brand Affiliation: None
- Has thanked: 45 times
- Been thanked: 121 times
Re: Flap Modification for Hand held Wings
yes the OP had some interesting ideas about why hydrofoils foils are bad and how he/they had been able to 'fix' them, ideas that nave never been adopted.Peter_Frank wrote: ↑Sun Feb 28, 2021 5:11 pm
Correct, kites don't have stored energi.
It is the sweep, like when a wind power station sweeps when turning, to extract energy.
So absolutely no resemblance to the use of flaps.
As the latter increase the max lift a lot, on cost of loads of drag.
But it might work in order to get one size to have a better upper end.
Sorry, I don't get the "reinvention" you wrote, what did you mean?
Kitefoil and wingfoil has and is some of the best things that has ever happened in wind sports, a game changer indeed.
The hydrofoil concept was invented more than 100 years ago though, if that was your point
Peter
Re: Flap Modification for Hand held Wings
Maybe somebody here with more aeronautical experience can help on this one, but:
Flaps are not an ideal solution to lowering stall speed/increasing low speed lift.
They are a somewhat acceptable solution where a rigid wing is used.
Sails (soft airfoils) do not need flaps, as sails have the ability to change camber/thickness of the foil cross section. This is how an adjustable outhaul works on a windsurfer. For increasing low speed lift, adding more camber is the nearest ideal solution. It's almost like having the ability to choose another NACA shape on the fly.
Adding something analogous to flaps to a soft sail/wing is applying a solution meant for a problem (rigid wing) that you dont have.
-
JakeFarley
- Very Frequent Poster
- Posts: 920
- Joined: Sun Nov 27, 2016 11:54 pm
- Kiting since: 2001
- Weight: 92kg
- Local Beach: Florida Left Coast, USA
- Favorite Beaches: Any that are not crowded.
- Style: Dinosaur style (Velociraptor)
- Gear: Kites: Flysurfer Speed5 21m, Soul 12m, Cabrinha 16m Xbow, 11m Xbow, Best 14m HP Nemesis, 9m Yarga C Hybrid
Boards: Crazyfly 135 x 46 Pro, Cabrinha Spoiler 140, 6' custom surfboard, 122 x 46 custom twintip
Wing foil: Naish Hover 110l, Slingwing 6.4m, F-One CWC Strike 8m, Slingshot Hover Glide Fwing (Infinity 99), Slingshot Phantasm 926 and E 990 - Brand Affiliation: None
- Location: Pearl City
- Has thanked: 187 times
- Been thanked: 144 times
Re: Flap Modification for Hand held Wings
Windsurfing sails used to have a line embedded in the trailing edge which could be tensioned (not sure if they still have them). Something similar could perhaps be done for wings? Also those wings that use a boom could have an "outhaul" tensioner to adjust the camber of the wing, similar to what we used to install on windsurfing race booms.
Who is online
Users browsing this forum: airsail, billybob, evan, Peter_Frank and 58 guests